Updating the near native image in DISCO can be accomplished using the Overlay feature. An overlay is a CSV or DAT file that, when applied to a review database via the overlay process in DISCO, can change the metadata, image, OCR text, or native file of a document.
Preparing your image overlay file
- Organize the images you would like to update in the database into a folder. The images must be multi-page PDFs.
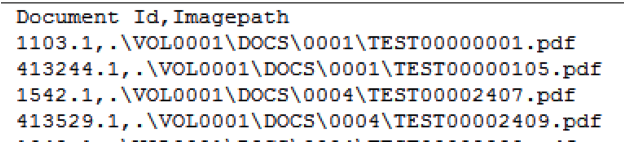
- The overlay file must have two fields:
- A unique ID to match the new images to the field in DISCO. You can use either the DISCO Document ID or Instance ID field
- The path to the image files, including the filename.
An example of a .csv overlay file that can update images is below:
Performing the overlay
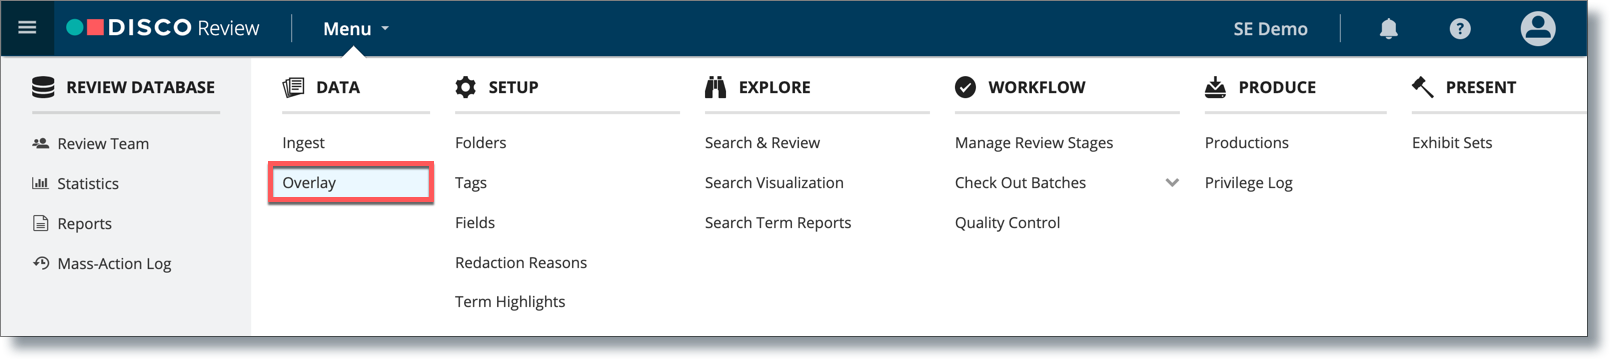
- In the DISCO main menu, click Overlay.
- Click New Overlay.

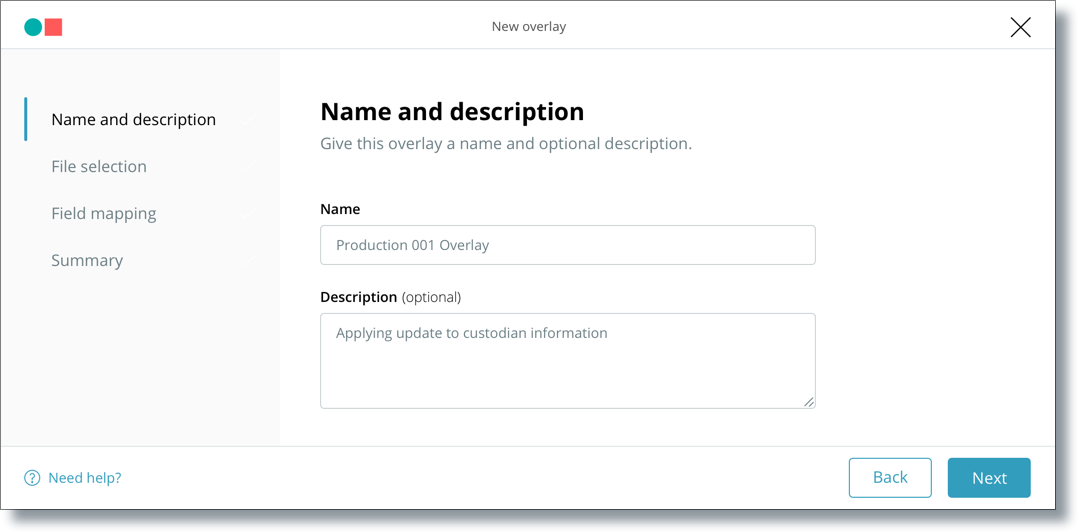
- On the Name and description page, enter a name and an optional description for the overlay, and then click Next. The overlay name will be displayed on the card.
- On the File selection page, navigate to and select the overlay file. Ensure that the referenced files are contained in a single folder and that any file paths are relative to the overlay file. Relative paths mean the file paths for referenced files begin with a .\ or with the folder name of the parent folder.
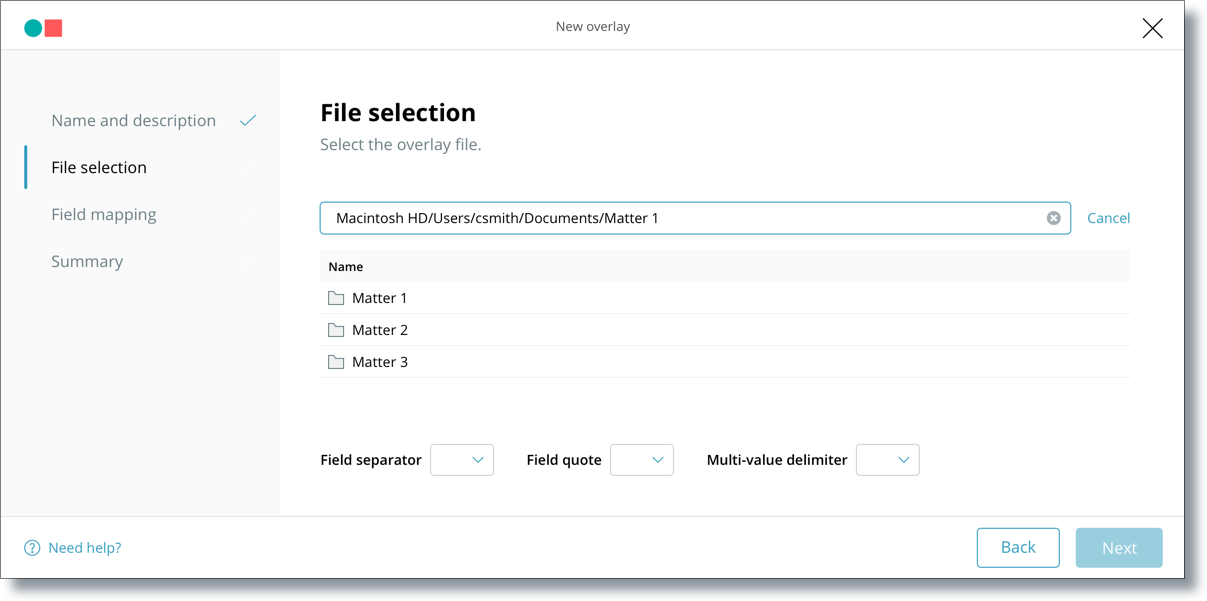
- On this page you can also select the delimiters used between fields in your overlay file. DISCO will pre-populate the delimiters based on the selected overlay file’s extension. These values can be changed by selecting a different value from the dropdown lists or typing in a new one. The three types of delimiters are:
- Field separator - A character separating the columns.
- Field quote - The character used to “quote” or group multiple items together, like a phrase. The field quote is particularly useful when overlaying a custodian in last name, first name format (e.g., “Jones, George”), where the comma is also used as a field separator.
- Multi-value delimiter - A character used to delimit multiple values within a column. In the following example, commas and semicolons are the delimiters:
,“Kinsley, Dave”;”Slovacek, Jerry”,
If you do not have a multi-value delimiter, leave the field blank. - Once you have verified the delimiters contained in the overlay file match the selected delimiters, click Next.
- You will now see the Field mapping page where you can map the fields in your overlay file to the corresponding system fields in DISCO. This is how you tell DISCO what to overlay where. In DISCO, we store individual copies of every file uploaded, also known as instances.
DISCO combines the data from duplicate instances into review documents. Some fields are stored on individual instances, while others are stored on the document level. When overlaying, the identifier you select may change the behavior of the overlay. See Overlayable fields for more information. - You must first establish a method of relating the documents in the overlay file to the documents in the review database. This is often referred to as a control key. When selected, the Overlay file dropdown will display all of the column names in your overlay file. Select the column name containing the values DISCO will use to identify the documents in the database. DISCO will read the first 25 rows of the column you select and auto-populate the corresponding DISCO identifier type: Instance ID, Document ID, or Bates number.
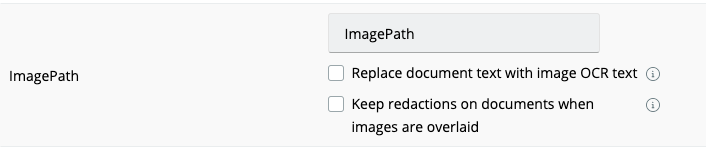
- To update the image for a document, map the column in your overlay file that contains the relative path to your image files to the ImagePath field in DISCO.
- You can choose whether to re-OCR the new documents to update the text in DISCO. Note that changing the underlying text of a document may modify whether a document returns in search results.
By default, DISCO will remove redactions from images that are overlaid and note any redactions that are removed in the overlay report. If desired, you can choose to keep redactions on documents when you map to ImagePath. Note that the location of redactions on images is fixed relative to the image size, so if you change the size or aspect ratio of an image via overlay, the redactions may no longer be covering the same information.
- Next, map any desired remaining fields in your overlay file to corresponding DISCO fields. Not all overlay-file fields must be mapped and not all DISCO fields must be used. DISCO automatically attempts to match the DISCO field name to the corresponding overlay-file field name.
To map or change the mapping of the column in your overlay file, click on the corresponding pre-mapped DISCO field or unmapped placeholder. If a matching DISCO field already exists, select it from the dropdown list. If a matching DISCO field does not already exist, you can create a new custom field in the database by typing the name of the new custom field or selecting a custom field name supplied in the overlay file.
If the field mapping tool does not properly display your data load-file fields or displays an error message, there is something wrong with your load file’s delimiters. Please ensure your overlay file is a valid text delimited UTF-8 or ANSI text file. - Once you’ve finished mapping all the fields you want to overlay, click Next.
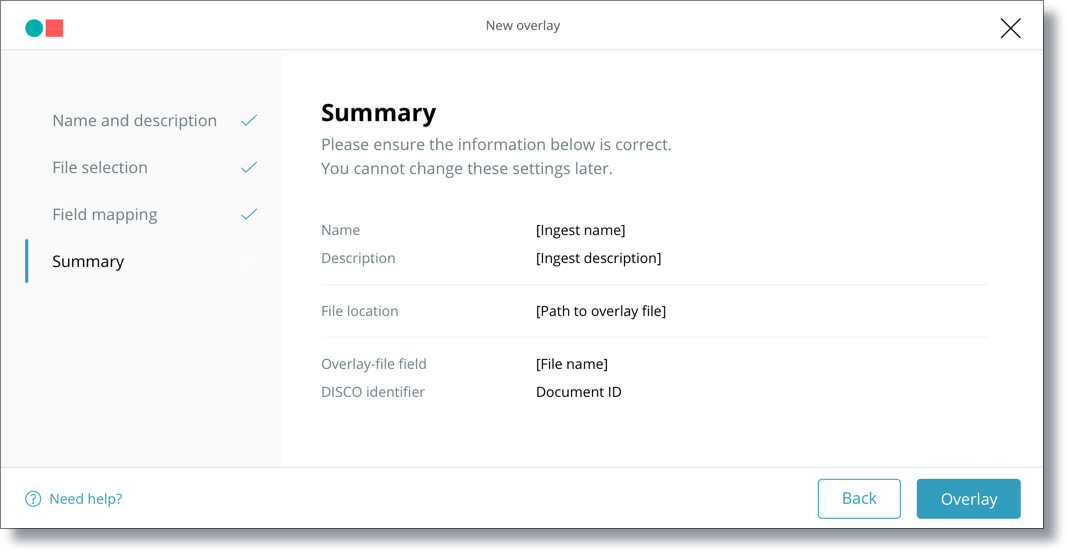
- Review everything on the Summary page and ensure it is correct. If everything looks correct and you’re ready to proceed, click Overlay.